How to Migrate Your Android Build From Groovy/buildSrc to Version Catalog


1. Overview
In this tutorial, we’re going to learn how we can add/migrate our Android app from using Groovy as our scripting language and buildSrc to manage our dependencies to using Version Catalog. Essentially, the version catalog is a dependency management tool developed by the Gradle team.
Whilst using the buildSrc method provides an isolated Gradle module which is used to manage our dependencies and also provides type safety, it results in common issues such increase in Gradle build times when we edit our build.gradle file.
2.Benefits of Using Version Catalog
Type safety
Straight forward setup
Version catalogs can help manage dependencies between different components of a project. This ensures that the right versions of libraries, frameworks, or modules are used together to maintain compatibility
Auto dependency updates
Centralized version control
Using bundles to combine multiple libraries into a single unit
3.Setting up the Version Catalog
Note that the minimum Gradle version required in order to set up Version Catalog in Android Studio is 7.4.
To check our Gradle version, we’ll run the following command on our terminal:
./gradlew -version
4. Create libs.versions.toml
Our first step is to create the libs.versions.toml file in our root Gradle folder. This file is used to declare versions, plugins, libraries and bundles required by our project.
An example of our libs.versions.toml would look like this:
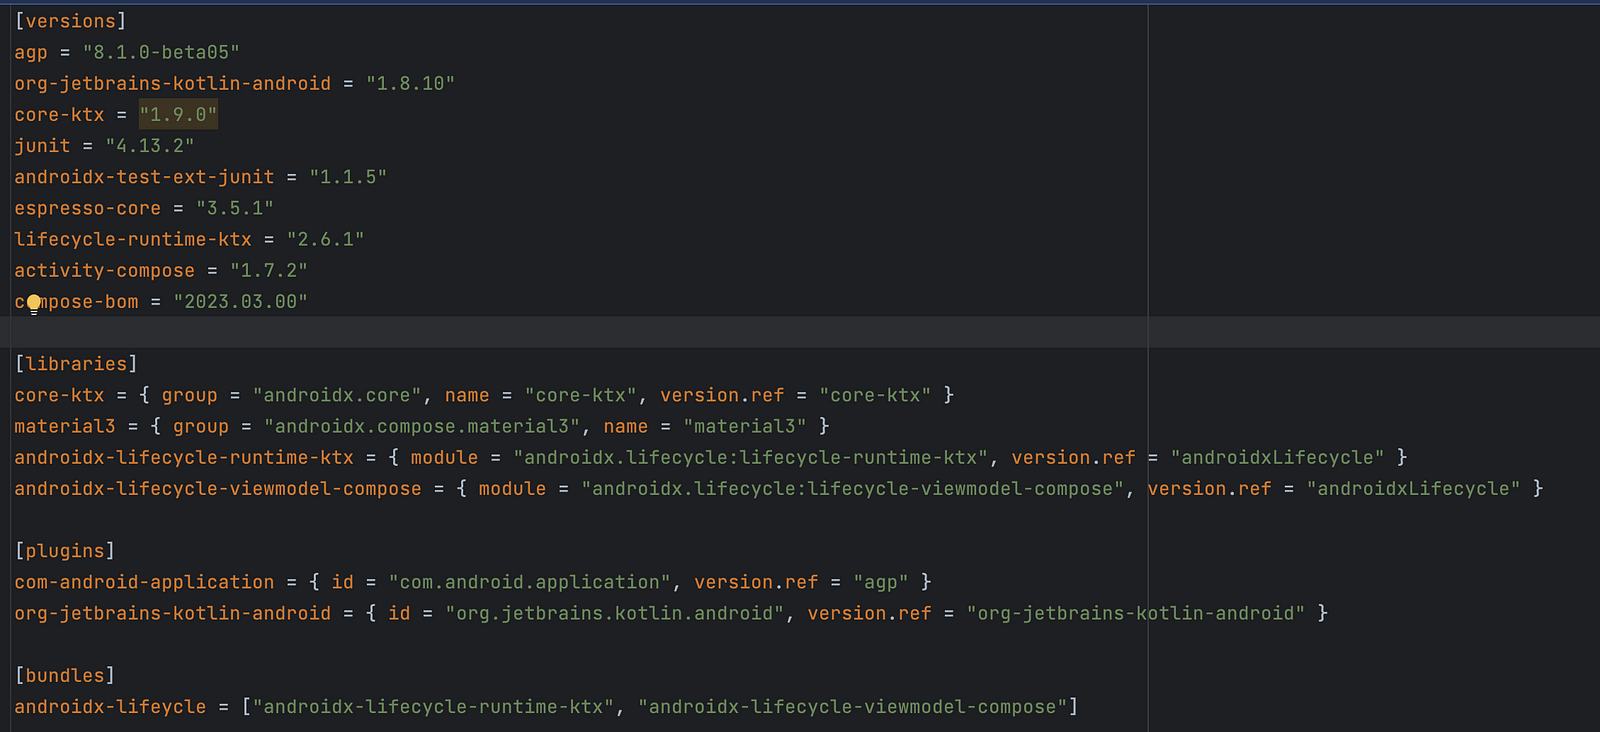
[versions]-used to declare versions that are referenced by[plugins]and[libraries][plugins]- used to define a set of plugins with version.[libraries]- Used to define a set of library dependencies with version.[bundles]- usually used to combine multiple libraries into a single reference.
Note that [bundles] works only with libraries and it won't work for plugins.
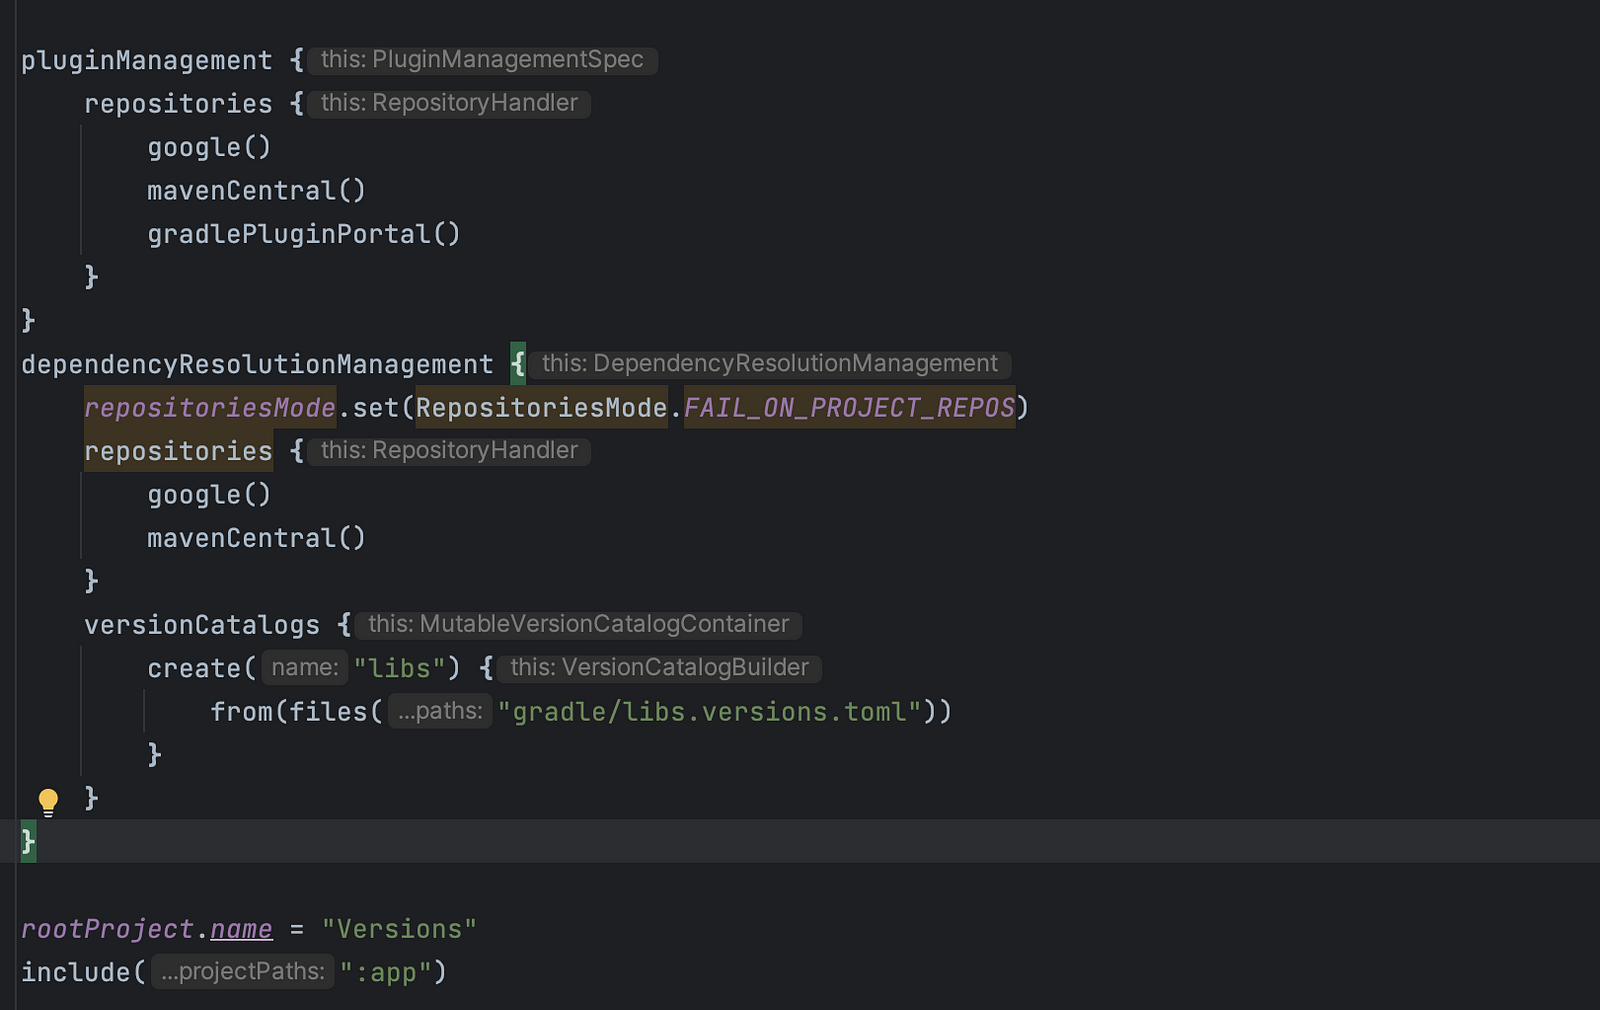
Step 2.
After creating our libs.versions.toml file we’re required to rename our settings.gradle file to settings.gradle.kts.
Afterward, change the following line in settings.gradle.kts.
From:
include ‘: app’
To
include (“: app”)
Note the parentheses and double speech marks used.
Our next step is to make sure we enable the version catalog in our settings.gradle.kts file. This is achievable by adding the following code block.
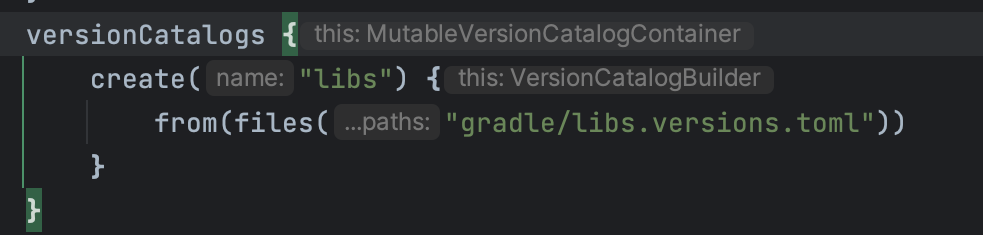
The final look of our settings.gradle.kts will be:
Step 3:
In this step, we’re going to update our build.gradle.kts files to use version catalog in the following manner.
Initially code for plugins in our build.gradle file was:
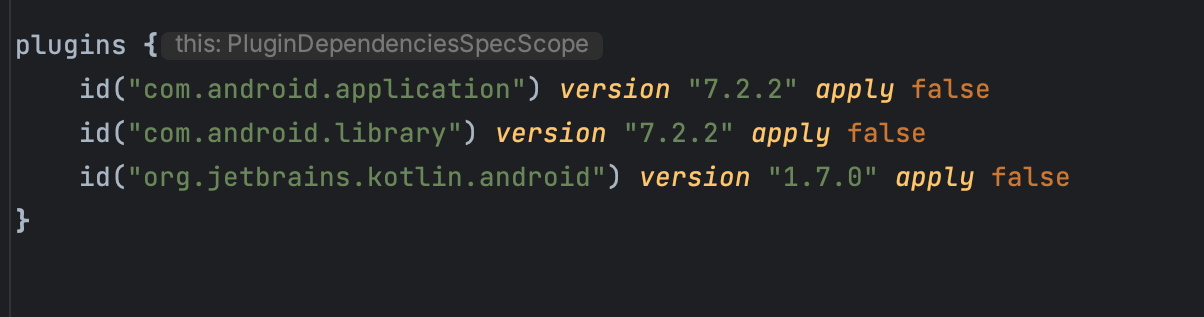
After the update we'll have the following:

Alias is simply a method used to add plugin dependency using notation from the version catalog.
Replace the plugins at our app module level from:
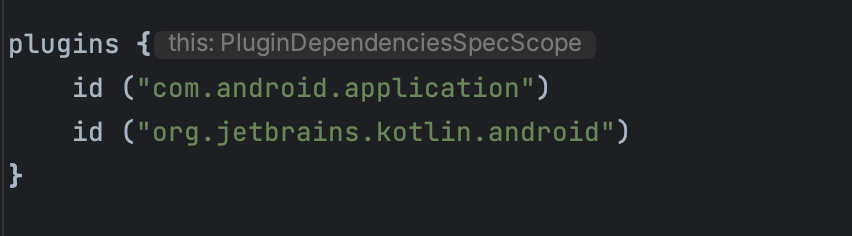
To:

5.Updating Library Dependencies
In this step, we’ll update our dependencies for the different frameworks we’re using in our application. For a single dependency, we update our dependency from.

To:

In our second example, we’ll use dependencies for multiple libraries. Example of multiple libraries code block:
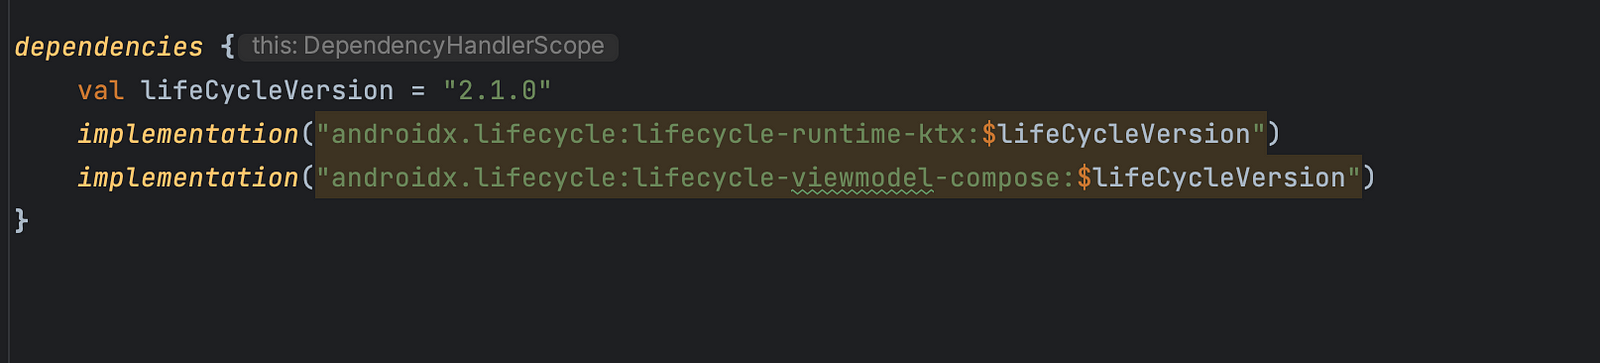
will easily be replaced with:

Essentially replacing our multiple code block of dependencies with just a simple line of code above is what we refer to as using bundles in version catalog.
6.Conclusion
In this article, we went through the version catalog which is a dependency management tool by Gradle, its benefits and how we can integrate it into our Android application.